How to See the Images Codex Generates When You Watch It From a Browser
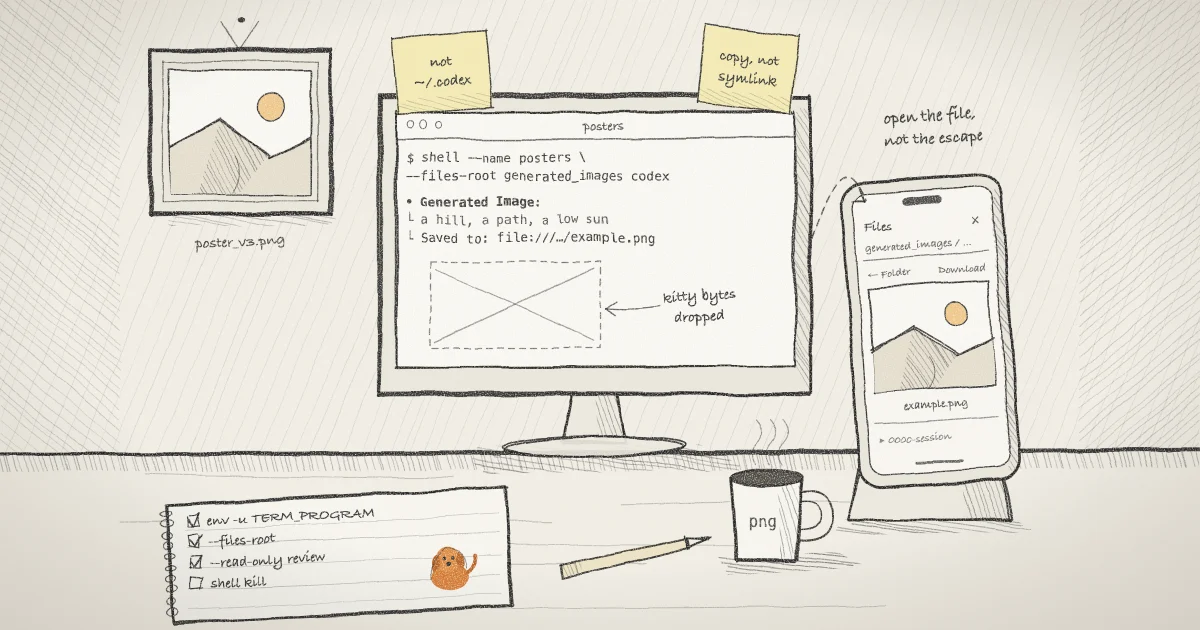
Codex 0.164.0 draws image previews with Kitty or Sixel graphics, which a browser terminal drops. Open the saved PNGs through shell's Files panel instead.
Artemii Amelin9 min read
Contents
- Why the browser never sees the thumbnail
- Step 1: See what your terminal tells Codex
- Step 2: Start Codex with the image folder opted in
- Step 3: Open a generated image from the link
- Step 4: Narrow the folder before you show a teammate
- Step 5: Close it when the review is done
- What this setup does not do
- When the image has to reach another agent
OpenAI released Codex CLI 0.164.0 on October 23. One line in its notes says you can now "preview viewed and generated images in the fullscreen transcript on terminals supporting Kitty or Sixel graphics." The pull request behind it describes bounded thumbnails drawn next to each generated image's saved path, with text-only entries kept for unsupported terminals, remote workspaces, missing files and oversized images.
That is useful when you sit in front of Ghostty, kitty, WezTerm or a recent iTerm2. It does nothing for you when the terminal you are looking at is a browser tab on your phone, and it can do something slightly worse: if you start the shared session from one of those terminals, Codex inside the session still believes it can draw pictures, so it sends them to a viewer that throws them away.
This guide shows why that happens, how to start Codex under shell so its transcript stays honest about what the browser can show, and how to open the PNGs it generates from the same link with the session's Files panel. Everything about shell below comes from the shell.online repository as it stands today, whose latest release is v0.25.0, read on the macOS and Linux code path.
Why the browser never sees the thumbnail
Terminal images travel as escape sequences inside the output stream. The kitty graphics protocol wraps a base64 picture in an APC sequence, and its spec notes that "most terminal emulators ignore APC codes, making it safe to use." Sixel, as documented in DEC's VT300 graphics manual, rides in a device control string instead. Both sequence types are defined in ECMA-48, the standard for terminal control functions.
The shell.online viewer is built on xterm.js, and the web app loads no image support. Graphics in xterm.js come from a separate image addon that a page has to install and load, and shell's viewer does not load it. Without that addon, xterm.js parses an APC string and drops every byte of it. Nothing breaks, and nothing is drawn.
The part that surprises people is how Codex decides to send images at all. In 0.164.0 the choice is made in image_protocol.rs and the terminal detection crate, and it reads environment variables rather than asking the terminal. KITTY_WINDOW_ID, GHOSTTY_RESOURCES_DIR, WEZTERM_VERSION and a TERM_PROGRAM naming Ghostty, kitty or WezTerm all count as proof of Kitty support, and iTerm2 3.6 or newer gets a variant that hands the terminal a local file path. If TMUX or a Zellij variable is set, Codex turns images off.
When shell starts a program on macOS or Linux, it passes your environment through and overrides a few values, TERM=xterm-256color among them. It does not remove TERM_PROGRAM or the terminal-specific variables. So shell codex typed into Ghostty produces a Codex that thinks it is still in Ghostty, while its screen is actually being read by xterm.js in a browser.
Step 1: See what your terminal tells Codex
Check the Codex version first, since the previews only exist from 0.164.0 on:
codex --versionThen print the variables Codex looks at, from the terminal you would normally start the session in:
env | grep -E '^(TERM_PROGRAM|TERM_PROGRAM_VERSION|KITTY_WINDOW_ID|GHOSTTY_RESOURCES_DIR|WEZTERM_VERSION|WEZTERM_EXECUTABLE|ITERM_SESSION_ID|ITERM_PROFILE|TMUX)='If this prints nothing, or only TMUX, Codex already falls back to text entries and you can skip to Step 2 without the env prefix. If it prints TERM_PROGRAM=ghostty, a KITTY_WINDOW_ID or similar, the session will inherit those values. TERM itself is not in the list because shell replaces it anyway.
Step 2: Start Codex with the image folder opted in
Codex saves every generated image under its home directory. The artifact code builds the path as generated_images/<session id>/<call id>.png beneath CODEX_HOME, which OpenAI's authentication docs say defaults to ~/.codex. shell's --files-root flag opts one directory into the browser's Files panel, and the host opens that root when the session starts, so create it first:
mkdir -p "${CODEX_HOME:-$HOME/.codex}/generated_images"

env -u TERM_PROGRAM -u TERM_PROGRAM_VERSION -u KITTY_WINDOW_ID \
    -u GHOSTTY_RESOURCES_DIR -u WEZTERM_VERSION -u WEZTERM_EXECUTABLE \
    -u ITERM_SESSION_ID -u ITERM_PROFILE \
  shell --name posters \
--files-root "${CODEX_HOME:-$HOME/.codex}/generated_images" codexenv -u removes each named variable before running the rest of the line, as the env manual describes, and the macOS env accepts the same flag. shell then starts Codex in the background, prints one browser link and a ten-character password, and returns your prompt. --name posters is the label you will see in shell list and in the web app. The variables are gone only for this session; your own terminal keeps them.
Codex uses the same detection for a few other terminal-specific choices, copy on select among them, so a session started this way behaves like Codex in a plain xterm. I think that is the right trade when the screen is meant to be read in a browser.
Do not set --files-root to ~/.codex itself to save a step. That directory holds config.toml, session history and, when Codex uses file storage, the plaintext auth.json with your login. shell's Files panel lists every regular file under the root, dot files included, and anyone with the link and password can open them. Point the root at generated_images or at a folder of your own, never at its parent.
Step 3: Open a generated image from the link
Open the link on your phone, enter the password, and ask Codex for an image. Without the terminal hints, the transcript entry stays text: a "Generated Image:" heading, the revised prompt, and a line like this one, rendered by the history cell code as a file URL:
└ Saved to: file:///Users/you/.codex/generated_images/0000-example-session/example-call.pngThat URL points at your computer's disk, so tapping it in a browser on another device goes nowhere. Use the Files control instead. It appears in the session view whenever the host opted files in, titled with the root's folder name, here generated_images. Inside it you will see one folder per Codex session. Folders sort first and names sort alphabetically, so match the session folder against the Saved to line rather than expecting the newest at the top.
Tap the PNG and the panel asks the host for it over the session's encrypted connection, then draws it as an ordinary image using a blob URL that it revokes once the picture loads. The host picks the type from the file extension with Go's mime.TypeByExtension, so a .png is shown as a picture. Previews are capped at 16 MiB and downloads at 128 MiB. A Download button sits next to the file name when you want the original on the phone.
Nothing is pushed to the browser. The panel fetches the folder listing when you open it and the file when you tap it, which is how shell help files describes the design: the relay routes request IDs and encrypted frame sizes, not paths or contents. The security page covers the rest of the threat model. The encryption page covers what the relay can still observe.
Step 4: Narrow the folder before you show a teammate
generated_images keeps the output of every Codex session on the machine, not only this one. That is fine for you, and probably more than you want to show someone reviewing today's work. Codex already tells the model, in the hint its image tool returns and in its sample image generation skill, to copy an image it needs elsewhere and leave the original in place. Ask for exactly that, and share only the destination:
cd ~/work/poster-site
mkdir -p review

shell --read-only --name poster-review --files-root ./review codexThen tell Codex to copy the images you picked into review/. A --read-only link blocks typing in the browser, and the docs say plainly that read-only access does not cancel file access you enabled, so the teammate can open everything in review/ and nothing else. You keep the keyboard locally with shell attach, and press Ctrl-X, then D to leave the process running:
shell list
shell attach 4f7c2aCopy, do not symlink. The host builds the Files panel on Go's os.Root, which refuses paths that escape the root through .. or symbolic links, and the listing skips symlinks entirely. A link from review/ back into ~/.codex simply does not show up. The earlier post on file access without handing over the filesystem goes through those checks in more detail.
Step 5: Close it when the review is done
shell kill 4f7c2aThis stops Codex, takes the link offline and ends file access with it, because the Files panel only exists while the host process does. If the link and password reached more people than you meant, shell password rotate 4f7c2a replaces the password and URL salt without restarting Codex and disconnects current viewers. Rotation cannot take back an image somebody already downloaded. The read-only link post covers when a view-only link is enough on its own.
What this setup does not do
- It does not put pictures inside the browser terminal. The thumbnails Codex 0.164.0 draws stay a feature of local terminals with Kitty or Sixel support. In the browser you get the text entry and the Files panel.
- It does not tell you when an image appears. There is no notification and no gallery; you see the
Saved toline on screen and open the file yourself. - It does not reach files outside the root. A
file://path printed by Codex grants nothing, and the docs say so: a filename printed in terminal output does not grant access to it. - It does not cover Windows. Codex treats Windows Terminal as a Sixel terminal through
WT_SESSION, and I only read shell's macOS and Linux code for this guide. - It does not change Codex. Remote workspaces, missing files and oversized images already get text entries from Codex itself, with or without shell.
The CLI reference lists every flag used here, and the mobile page covers working from a phone.
When the image has to reach another agent
The Files panel is for a person looking at a picture. When the reader is another agent, say a reviewer that checks generated assets before they ship, it needs the file itself on its own machine. Pilot Protocol, which develops shell.online, is a networking stack for agents, and it has a transfer for that: Pilot's messaging docs show pilotctl send-file sending a file to a peer you have a trust link with, where it lands in ~/.pilot/received/. The Pilot write-up on peer-to-peer file transfer between agents argues for streaming files between agents over an encrypted tunnel instead of uploading to S3 and downloading again, and it notes that the receiver accepts connections only from trusted peers.
Watch Codex from any browser
Install shell, run shell --files-root with a folder you chose, and open the printed link on your phone. No account needed.